7 min read
Give Beet Seedlings Room in Two Thinnings
Work with the clusters that come from ordinary beet seed and keep the strongest plants spaced for useful roots.
On this page
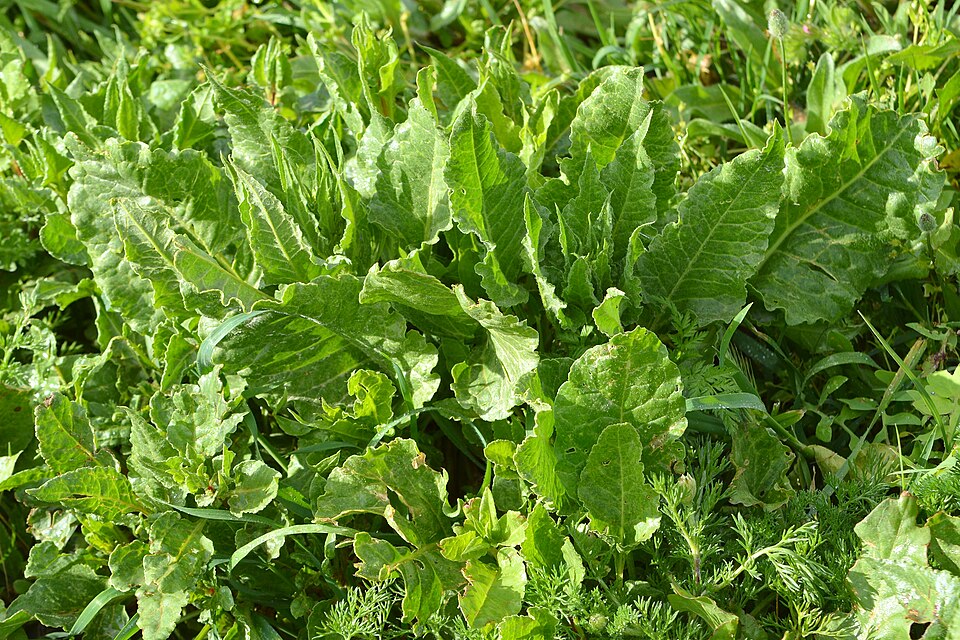
A careful line of beet seeds can come up as a series of tiny bunches. Several stems emerge from one position, followed by an empty stretch and another bunch. In many seed packets the thing you sow is a fruit cluster that can produce more than one seedling. The uneven appearance is normal. Thin close neighbors while they are small, then make a second decision about final spacing after you have seen how the row is growing. This saves time and gives each selected root room to develop instead of leaving every clump to sort itself out.
Beets are Beta vulgaris. Choose a garden beet variety meant for roots, and read both its mature shape and whether the seed is described as monogerm. Monogerm seed generally produces one seedling per unit. Conventional seed balls may yield several. Root shapes and colors differ among cultivars. You can plan the row to suit a round beet meant for an early harvest or a longer one that needs a different spacing and root bed. Check the seed packet for the root’s expected color and harvest size, and judge each plant by how its shoulders develop near the soil surface.
Keep the row visible long enough to work in it
Prepare a fine seedbed where you can reach across the young row from one side. A location with useful direct light is a good starting point. Beets can tolerate some shade, though root growth may be slower. If a stray corner of the bed becomes shaded by a tall crop by the time the plants need room, reserve it for a different job. Choose a site that drains and can be watered easily. Level the seed zone enough that water will not collect all the seeds at one end or leave a hard crust over the line.
Sow directly during a suitable period, often spring or late summer in temperate regions. Follow the seed packet for depth. Make the trial small enough to thin twice without rushing. Mark both ends and keep the label with the site. Water the ground with a gentle flow and check that the upper seed zone remains suitable for germination. If you are using two varieties, leave a definite gap or a label where one ends. They may emerge at different rates and form roots to different diameters at harvest.
Use a second marker to identify a short stretch of the row you can inspect daily for the first few visits. Note when the first leaves appear and where clusters form. A position with exactly one sprout may still gain another as the rest of the seed ball emerges. Do not evaluate the whole row too early. At the same time, avoid leaving tight clusters so long that individual seedlings become tangled by the time you can see them. A few extra visits while the plants are tiny can make both later thinnings quicker.
First, clear the tightest knots
Wait until the seedlings are developed enough to identify and handle. Look at where the stems enter the soil. Two or three plants can appear to be one from above, especially in a crowded short section. Select a sound, well placed stem in each close knot. Where pulling would disturb its roots, snip the extra stem or stems at soil level with clean scissors. This is usually easier than trying to split a cluster with a tool only a few inches away. Keep plants in the best positions and treat the first pass as a way to separate them, even if some still sit closer than their final spacing.
Let the row settle before judging sparse areas. A gap at one point can be useful for access later. It may not need a replacement if its neighbors are already growing strongly. In a severe gap, decide whether to sow a small fresh batch in another short section rather than mixing new and old plants into one uneven line. A group raised on a different date can be easier to harvest separately. If you fill a gap in place, mark it so you remember why those plants mature later.
Water after thinning only as the soil needs, and keep the surface free of weeds. Young beet roots compete poorly with a newly growing weed that reaches into the same space. Weed shallowly and work close to each plant by hand. Keep a few of the smallest seedlings one more cycle if you are uncertain where the best plant in a cluster will be, then return. Do not carry over a crowded patch through the entire season because the first cut took longer than expected.
Second, set the spacing for the root you plan to use
Once healthy growth has begun, take another pass. Look across the row rather than at only one cluster. Many ordinary root cultivars can be set about three inches, or eight centimeters, apart as an example; check specific directions for the variety and harvest size. In a looser section you may already have nearly the correct interval. In a closer patch, remove selected extras while preserving the best spacing. A little variation is manageable, but a group of four plants crowded into the span meant for one will have difficulty producing substantial roots.
Some mature thinnings can be useful if they have sound leaves or small roots and come from identified culinary plants. Follow normal food hygiene and use only clean plants grown and treated appropriately for eating. Keep the main leaf canopy on the plants you want to keep sizing up. The thinned plants can serve a purpose of their own without taking healthy leaves away from the designated root crop. Use scissors close to the row where pulling a plant would unsettle its neighbor, and pull only when the soil and space allow it.
Check the pattern after both thinnings are over. Use the handle of a hand tool as a rough length marker if the spacing is hard to see. Stand at the end of the row and note where the occasional larger space remains. It is tempting to think a line with no gaps will yield the most food, yet roots from a well spaced row can each become more useful. Give those plants time to grow before deciding whether you need another batch. Make the next sowing smaller or thinner if this one came up in thick knots throughout.
Measure a few spaces again after weather has settled the soil. Sometimes a seedling left after the first thinning has neighbors close on both sides even if the rest of the row was easy to set evenly. Keep the one with healthy new leaves and enough room on at least one side. Note the place and see whether it reaches the same size as the more evenly spaced plants.
Let the soil and an early sample guide the harvest
Maintain fairly even moisture during active growth, adjusting for rain and drainage. If dry surface soil hides a wet layer beneath, wait and check again before adding water. If the bed dries at the rooting depth, apply water thoroughly. Keep weeds in check while the growing beets are still accessible. Do not scatter corrective nutrients on the assumption that every small or distorted root has the same deficiency. If there is a repeated serious growth problem, use a soil test and local guidance before deciding what to add.
Choose one representative root once part of the row reaches the expected usable size. Depending on cultivar and intended use, that may be in the broad range of about one to three inches in diameter. Loosen the root if the ground is firm and avoid disturbing the next plant. Clean and inspect it before deciding when to take the rest. Root color can vary from deep red to gold or patterned forms. The size, texture and intended use are more important for timing than expecting every one to match a picture.
Compare the sample with roots in a more crowded part of the bed, noting the difference rather than assuming all uneven growth came from the seed. A plant in the middle of a gap can have more room and light. A plant at the end might have dried more often. If the crop is tender at the size you tested, take usable roots in stages as they reach it. Keep the labels until the last picking so you can distinguish one variety's response from another.
Put the thinning record with the seed packet
Write down whether the packet produced clusters, the dates of both thinnings and the size of the root you liked. Add a note about the length of row that yielded enough for you. If the first pass was crowded, use a gentler flow of water and fewer seed units next time. If the row turned out evenly after the second pass, repeat the spacing and the useful cut. A beet row can start as a series of knots and finish with enough room for every selected plant to make a root worth taking.
Further reading: University of Maryland Extension guide to growing beets.