7 min read
Give Epimedium a Foothold Under a Tree
Plant barrenwort where a canopy dries the ground, and help a young patch get through its first summer.
On this page
The ground under a deciduous tree can look like two different gardens in one year. Before the leaves open, sunlight reaches the soil and the ground may feel damp for days. By midsummer the same patch is dark, the rain barely reaches it, and the tree takes up water well beyond the trunk. A planting chosen from a spring visit can fail in July. Epimedium, also called barrenwort, is worth considering there because many garden forms cope with root competition once established. The phrase “once established” is the part to plan for.
Start with a corner small enough to water by hand. A patch near the outer canopy can show whether this strategy will work before you spend money on a ring of plants. Aim to see new leaves, a firm crown, and roots reaching into the surrounding ground by the next growing season. A continuous mat is an eventual outcome, especially for spreading forms. In the first year, open ground between plants is entirely useful. It lets you see whether water is reaching the soil and gives each young crown space.
Read the tree from the ground
After a normal rain, compare the soil under the canopy with a spot outside it. Move the loose leaf litter aside and sample the soil below the surface in both places. The difference is more useful than a rainfall total. Under a broad canopy you may find dry dust closer to the trunk, a damp line where branches drip, and a more even patch farther out. Repeat once the tree is fully in leaf. A spot that receives useful rain in March may depend on you all summer.
Make a sketch showing the trunk, exposed roots, and the easiest route from your tap. Mark the hours of direct sun in the warmest part of the day. A bright patch early in the morning is different from a hot beam that lands on the leaves for the middle of the afternoon. Reflected light can also make one side noticeably warmer, especially beside paving or a pale fence. The best starting point is often a small gap between roots near the outer branches, with some morning light and a good approach from a path.
Skip sites where planting would require cutting substantial roots or raising the grade around the trunk. Filling several inches of soil over the whole area to create a planting bed can injure the tree. Keep the root flare visible and plan around large roots. For a tree that is already stressed, newly planted or unusually valuable, consult a qualified arborist before disturbing the root zone. You can still put a shade container on an adjacent paved surface if there is nowhere suitable to plant.
Match the plant to the amount of dry shade
Epimedium is a genus with varied habits. Some selections hold their leaves through mild winters, while others disappear above ground. Some make a modest mound; others travel on rhizomes and join into a useful groundcover. Read the label for the cultivar's mature spread and ask the nursery how that plant behaves locally. A small clump is an advantage beside miniature woodland plants. A spreading sort makes more sense under a broad canopy where it can eventually occupy a distinct area.
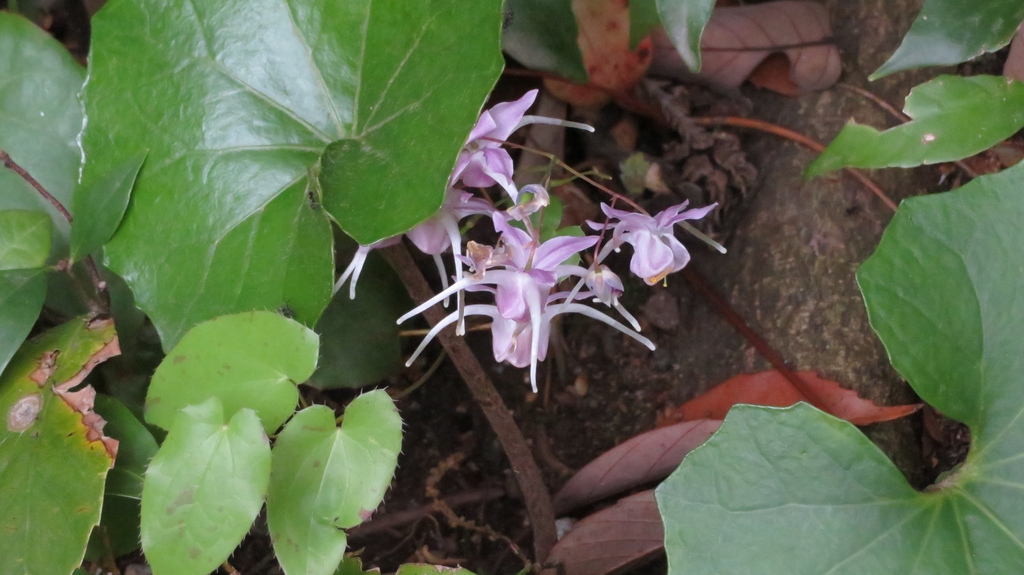
Dry-shade choices often include cultivars of Epimedium × perralchicum, Epimedium × versicolor and Epimedium × rubrum. Many forms of Epimedium grandiflorum suit a more evenly moist, woodland-like spot. The open flowers and fresh foliage of that species may be exactly what you want beside a path with afternoon shade and reliable access to water. At the driest end of the bed, favor the plant the nursery has actually grown under similar conditions. Two cultivars that look almost identical in pots can differ in how quickly they spread.
Check the crown of the plant you buy. The leaf stems should arise from firm tissue. A few damaged older leaves are ordinary on a carried-over pot. A foul smell, wet collapsing stems, or roots jammed into a recently oversized pot are reasons to look at another plant. Small plants can be easier to tuck between roots than large specimens, particularly if their root balls are well knitted. Buy fewer than you think you need and place them where you can reach with a watering can.
Fit plants into gaps
Set plant pots on the ground before digging. Walk past at ordinary speed, then look again from the nearby window or terrace. Consider where the flowers will be visible. A loose wedge with its wide edge near the path usually reads better than a tight circle around a trunk. Leave breathing room beside existing perennials and keep plants away from the trunk flare. If a hole reveals a large root, move the plant sideways. Mature spacing is a guide for the planting as a whole, even when the individual positions must shift.
Water the nursery pots before planting. Lift a plant out and gently release roots that have started to circle, keeping the young crown intact. Open a shallow hole large enough for the root ball without forcing it down between woody roots. Set the top of the root ball level with the surrounding soil, fill around it with loose soil from the hole, press gently and water. A thirsty pocket of nursery compost can dry out even when nearby native soil looks damp, so check the edge between the two mediums after watering.
A light layer of leaf mold or small leaves can slow surface drying. Leave the crown visible and keep mulch clear of the tree trunk. Shredded leaves settle more evenly than heavy wet sheets of broad leaves. After a windy week, look for drifts that have buried the smallest plants. Move those drifts back onto open ground. Skip rich additions in individual planting holes. Moderating drying at the surface is usually more helpful than creating a pocket of different soil that new roots are reluctant to leave.
Water until the roots leave the pot shape
For the first few weeks, inspect the root zone frequently enough to learn how it dries. Use a hand trowel near the edge of the plant's root ball. If the site is dry below the surface, apply water slowly enough for it to sink in, then check again. A superficial damp ring can hide a dry core. Hard, dry soil can initially shed water; two passes with a pause in between can work better than pouring rapidly and watching it run to the low side.
As the plant settles, water a slightly wider area around it to encourage roots into the surrounding soil. Where water is scarce, establish a handful of plants well instead of watering a large area too lightly. Soil texture, weather and the size of the tree make a fixed timetable unreliable. Pay attention during hot, windy spells and when the canopy is thickest. If leaves droop briefly on a hot afternoon but recover by early morning and the soil is damp, observe again before adding water. Persistent wilting alongside dry soil calls for a more thorough soak.
For a useful comparison, choose two plants at the moment you put them in. Note how much light they get and how quickly the soil dries after watering. Photograph each from the same direction later in the season. If the outer plant is making leaves while the inner one slowly declines, move the struggling plant when the weather turns cool enough for transplanting, or adjust irrigation if that inside position is essential. There is little value in filling a second area with the same plant until you know which part of the first area is working.
Decide how to handle old leaves
Leave foliage in place while it remains healthy and attractive. Winter foliage can keep a border visually settled, especially alongside dormant deciduous ferns. When older foliage is ragged, look for rising flower and leaf stems before clipping. On evergreen forms, where you choose to remove older leaves for a clearer view of the flowers, do it while you can distinguish old stalks from emerging growth. In a mild winter those new stalks may appear earlier than you expect. Cutting individual damaged leaves is easier to control than shearing a whole patch late.
With deciduous forms, keep a small marker beside each clump so you can avoid digging there during dormancy. In spring, check around the marker for slugs where soft new growth appears. If a plant fails to come up, look carefully for a firm crown before assuming it has died. A crown rotted in a waterlogged pocket suggests a different correction from one that failed after an exceptionally dry summer. A late returning cultivar may need nothing beyond some patience and a fresh label you can still read.
Make the second planting smaller and smarter
At the end of the first full growing season, measure the living spread of the patch instead of counting flowers. An evenly expanding crown and sound foliage matter more than a heavy bloom on a newly purchased pot. Note where each plant had dependable moisture. Use that evidence to decide which gaps to fill in autumn or another locally suitable period. Below a tree with hungry surface roots, a modest planting placed precisely can be more dependable than an ambitious bed.
Leave a path or narrow access strip so you can remove fallen branches and refresh the leaf mulch without standing on the crowns. If a spreading form begins to crowd other small plants, lift or divide a portion once conditions suit transplanting. Use a piece with healthy shoots and roots, and give that new piece the same establishment care as the original. Over time, the planting becomes a set of connected patches that follows the shape of the tree's shade. It can stay that way even if some ground remains open around the roots and at the trunk.
Further reading: Royal Horticultural Society guide to epimediums.